[Lifetime Warranty] 100 PCS Non-Insulated Butt Connectors, Butt Splice Connectors
100 PCS Non-Insulated Butt Connectors, Butt Splice Connectors
Key Features
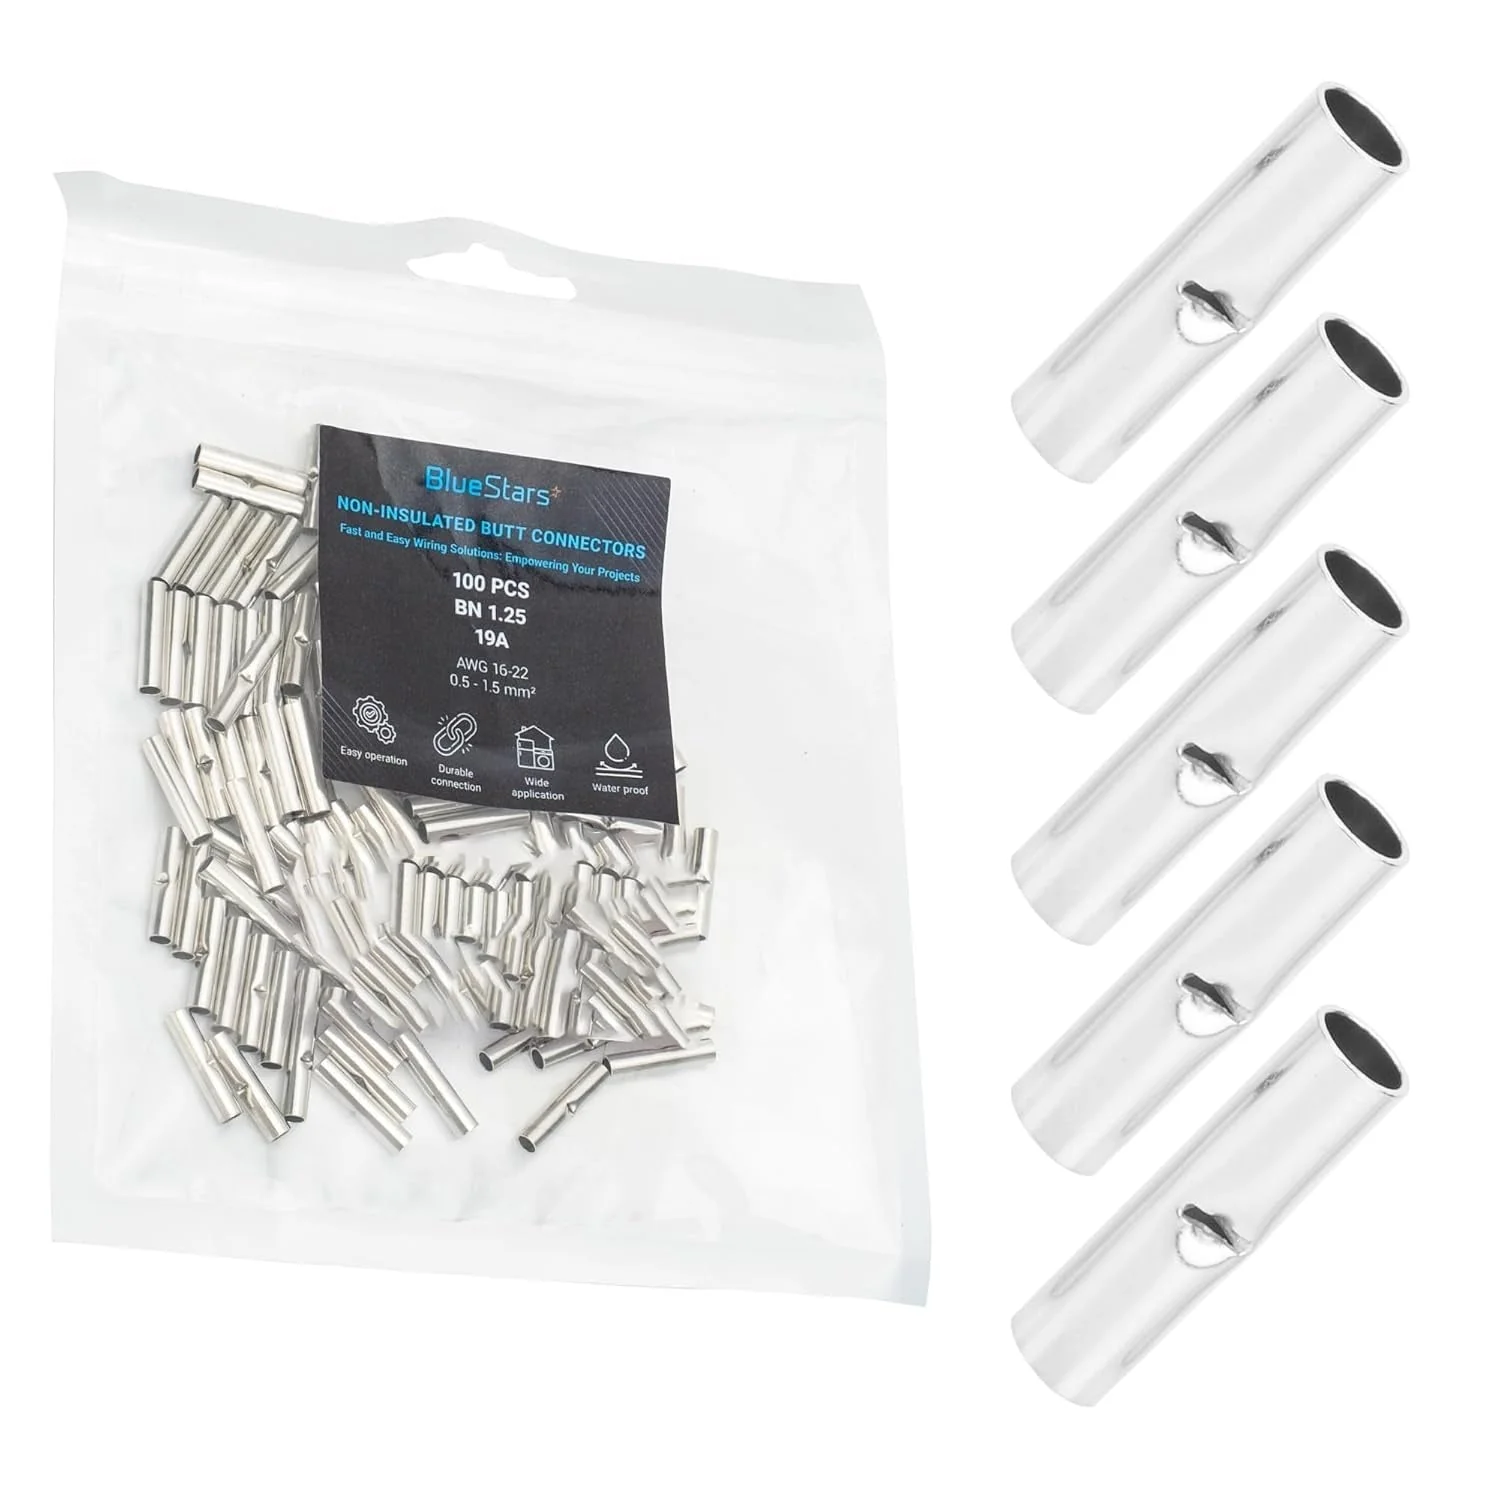
- Package Quantity: 100 connectors
- Type: Non-insulated butt splice
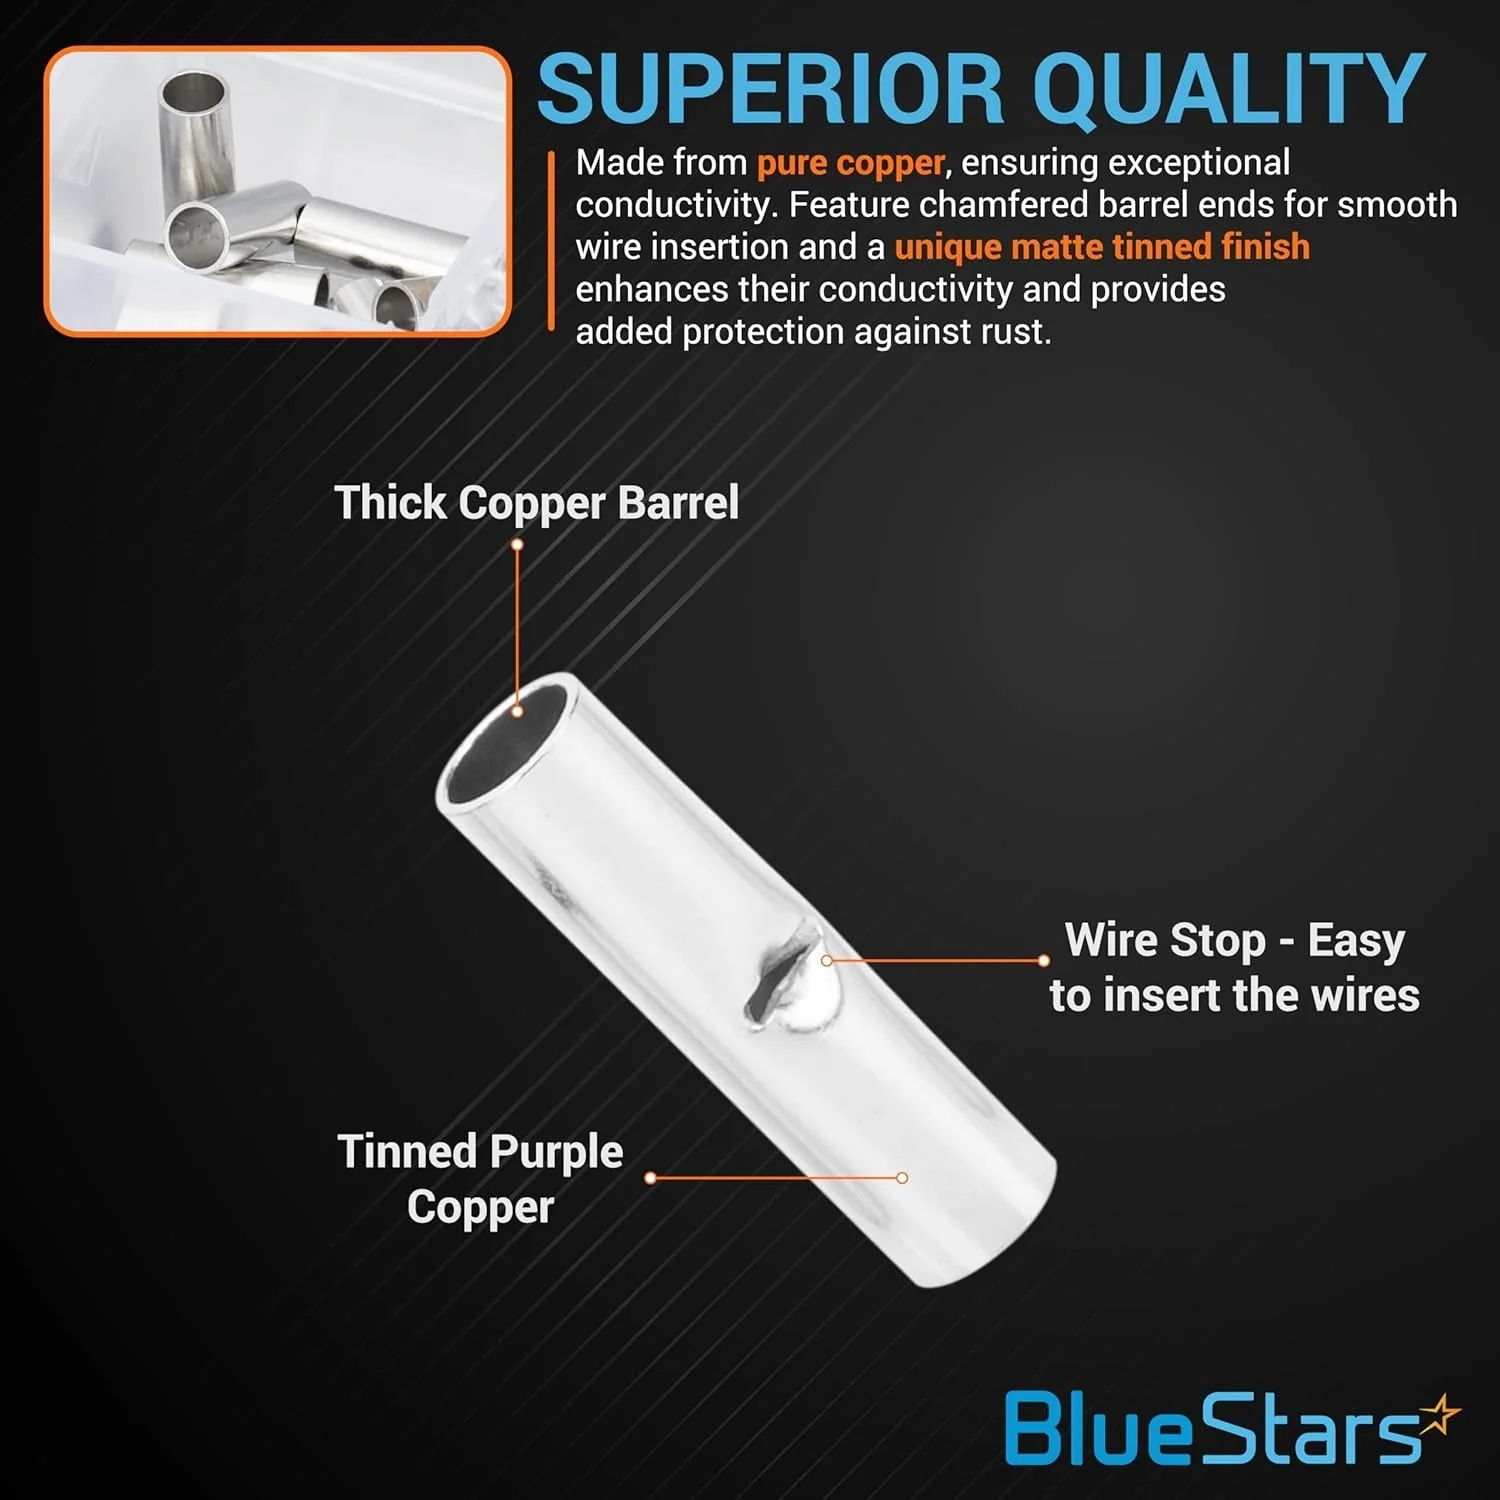
- Construction: High-conductivity tinned copper for corrosion resistance
- Design: Seamless barrel with a center wire stop for correct wire positioning and secure crimps
- Application: Joins wires end-to-end for repairs, extensions, or custom harness builds
Replaces / Cross-Reference Part Numbers
- BNT1
Compatibility & Fitment
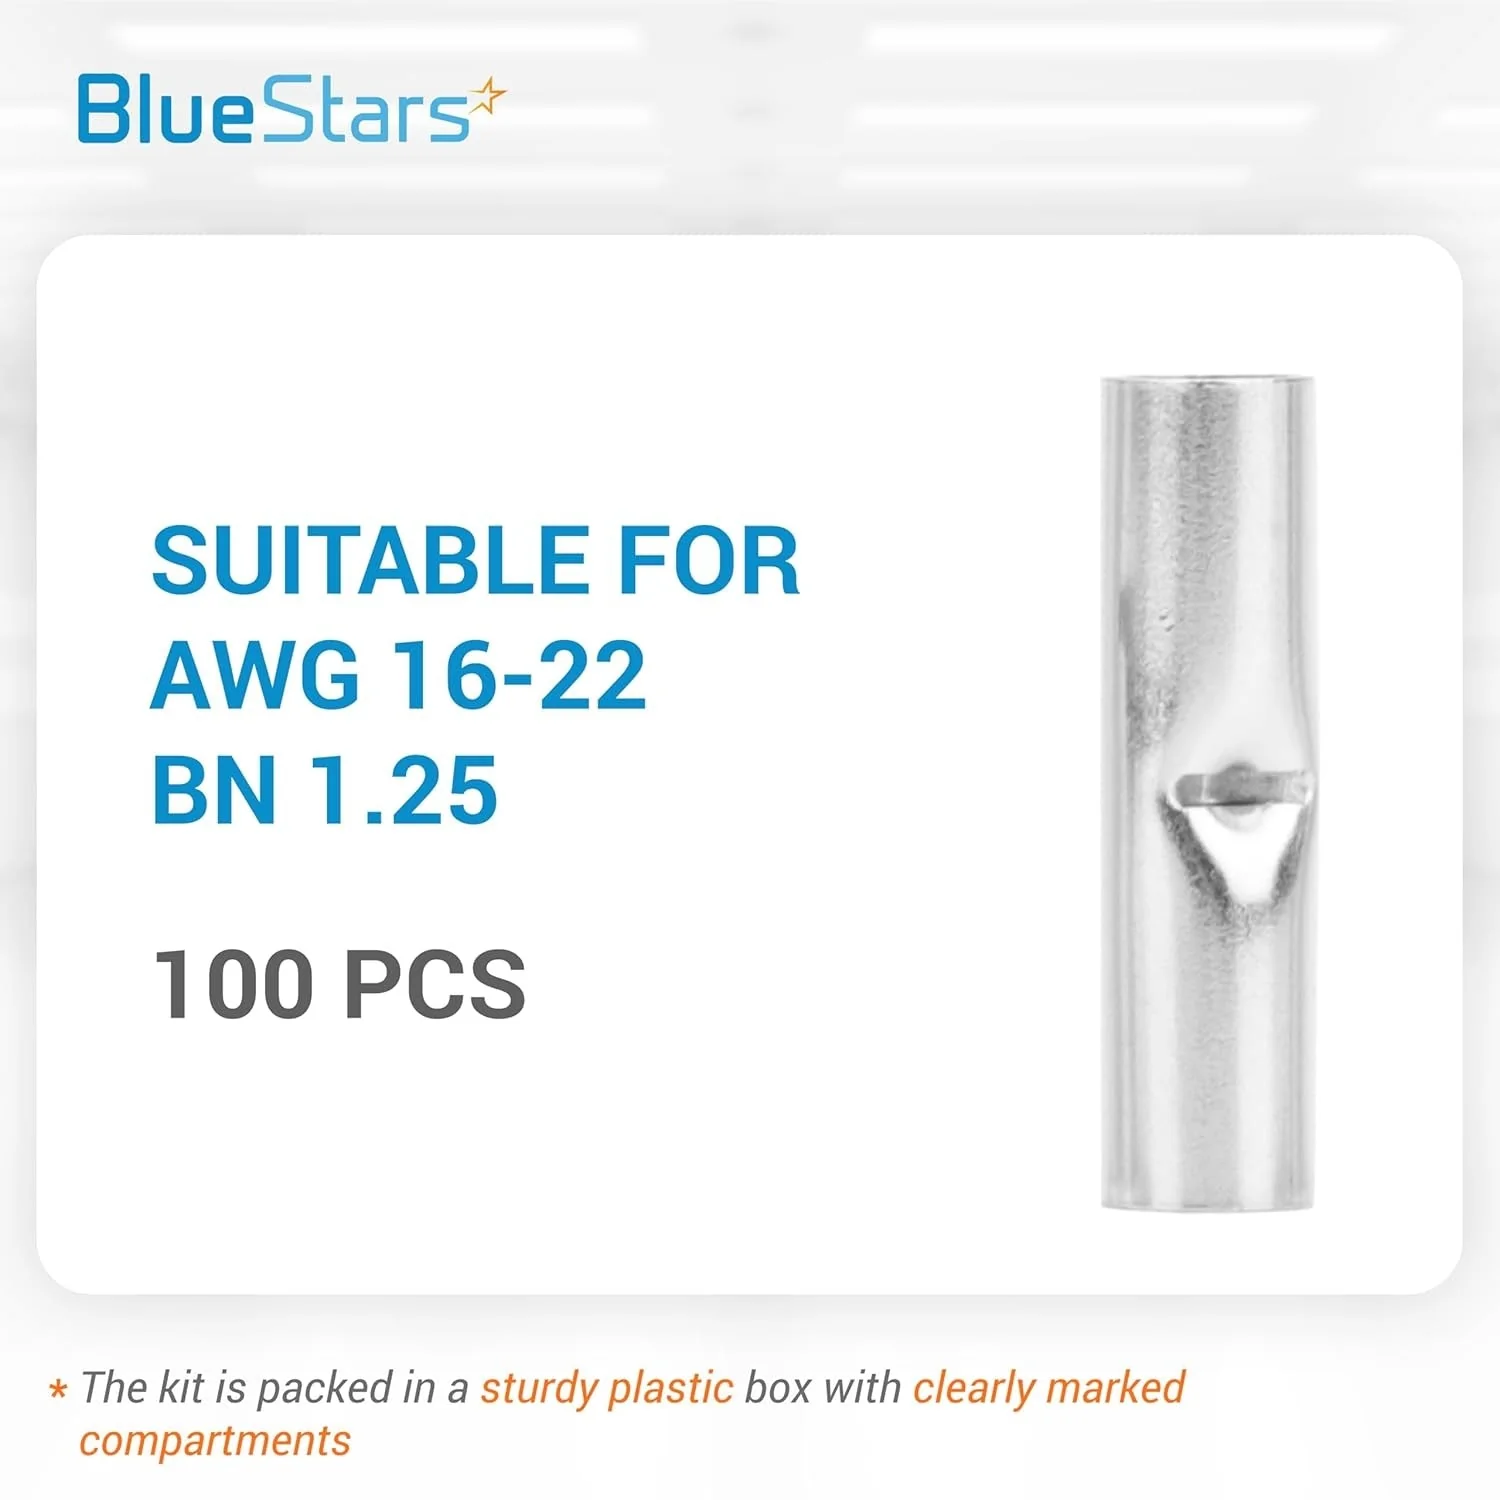
- Wire Gauge: 22-18 AWG
- Wire Type: For use with solid or stranded copper wire
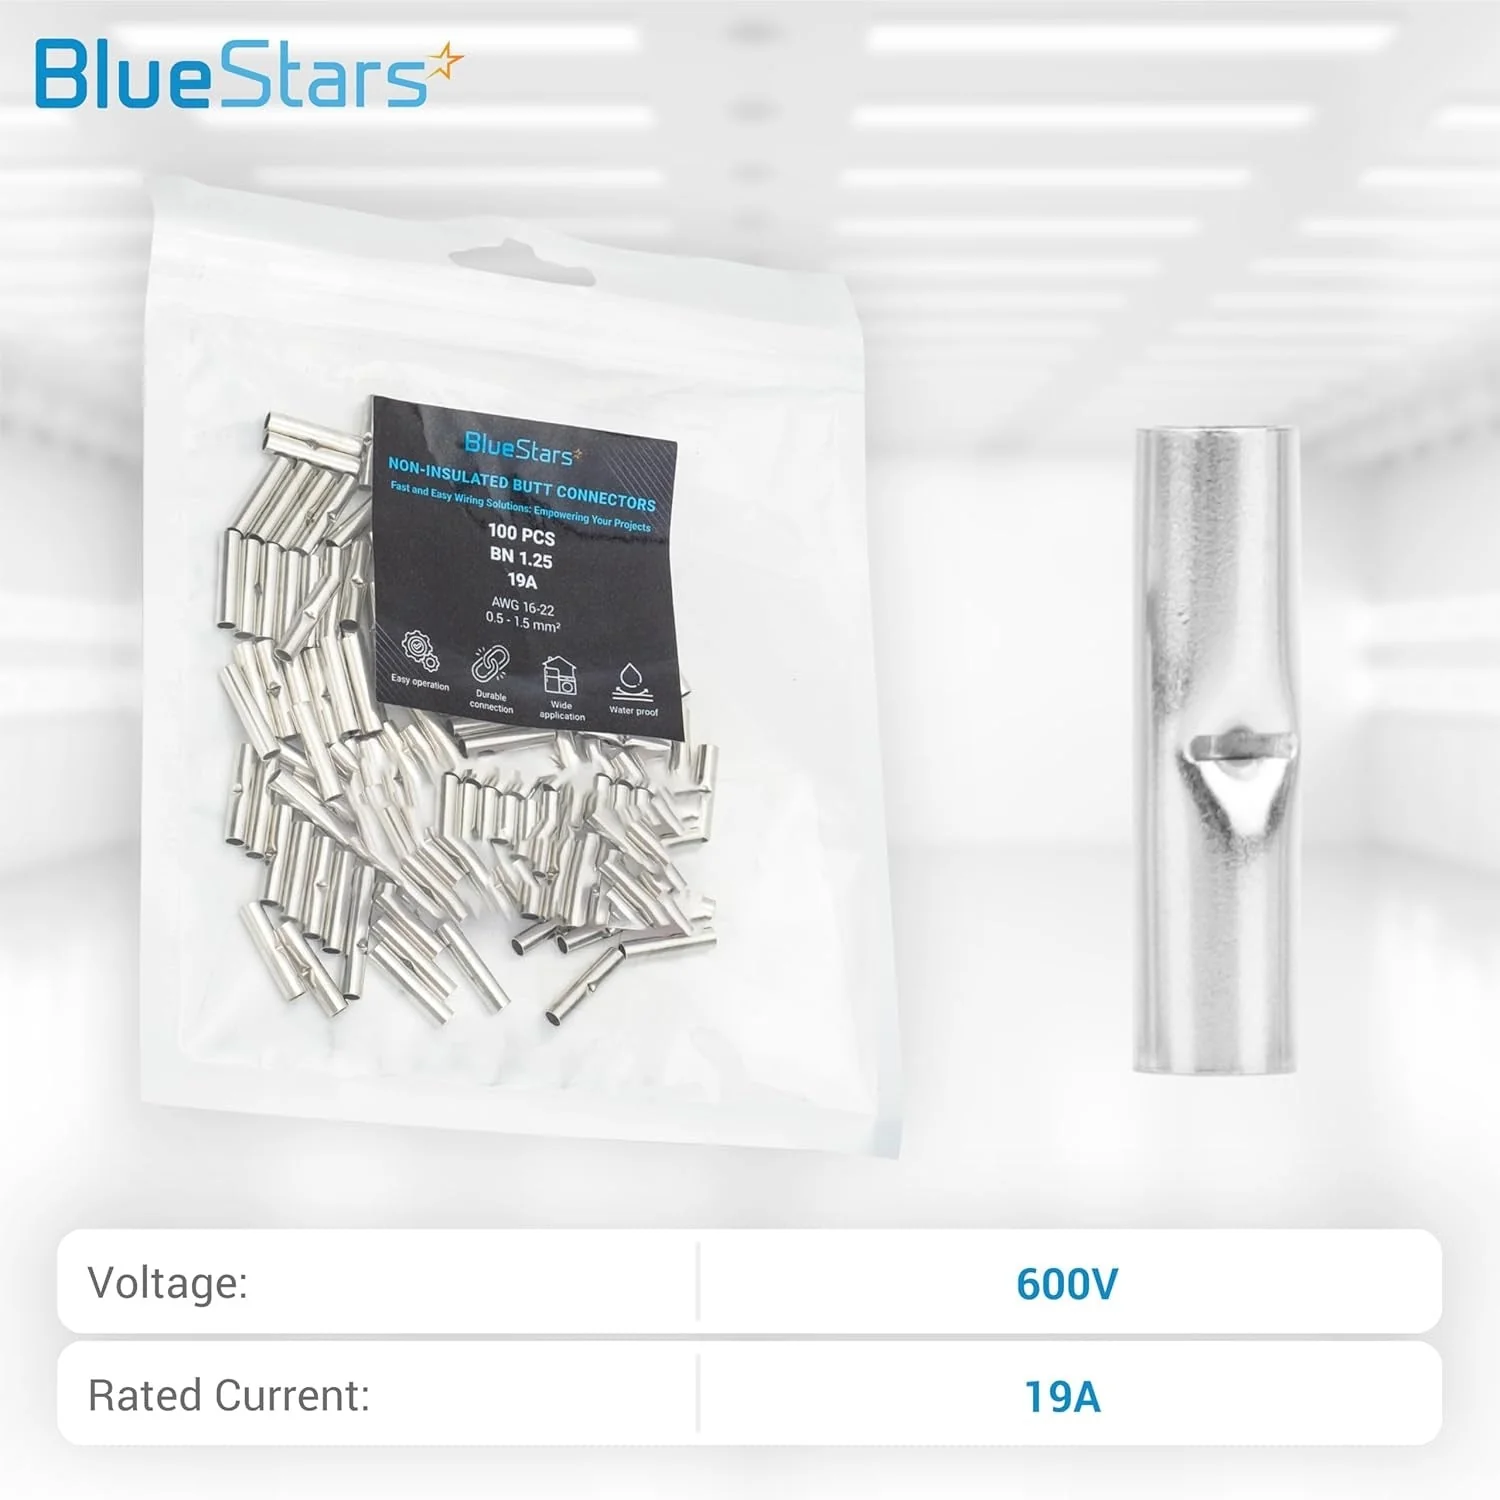
- Maximum Voltage: 600V
- Tool Requirement: Use with a standard crimping tool for non-insulated terminals
When to Replace
- To repair a broken or frayed wire
- To lengthen an existing wire run
- When building new or custom wiring harnesses
- To replace a faulty, corroded, or damaged existing connector
Installation Tips
- Strip approximately 1/4 inch (6-7mm) of insulation from each wire end.
- Insert one stripped wire into the connector until it contacts the center wire stop.
- Crimp the barrel securely onto the wire using the correct die on a crimping tool.
- Insert the second wire into the opposite end and repeat the crimping process.
- Verify the connection is secure by gently pulling on both wires.
- For added insulation and strain relief, cover the finished splice with heat shrink tubing.
Product Information
Product Information
Shipping & Returns
Shipping & Returns


[Lifetime Warranty] 100 PCS Non-Insulated Butt Connectors, Butt Splice Connectors
[Lifetime Warranty] 100 PCS Non-Insulated Butt Connectors, Butt Splice Connectors
100 PCS Non-Insulated Butt Connectors, Butt Splice Connectors
Key Features
- Package Quantity: 100 connectors
- Type: Non-insulated butt splice
- Construction: High-conductivity tinned copper for corrosion resistance
- Design: Seamless barrel with a center wire stop for correct wire positioning and secure crimps
- Application: Joins wires end-to-end for repairs, extensions, or custom harness builds
Replaces / Cross-Reference Part Numbers
- BNT1
Compatibility & Fitment
- Wire Gauge: 22-18 AWG
- Wire Type: For use with solid or stranded copper wire
- Maximum Voltage: 600V
- Tool Requirement: Use with a standard crimping tool for non-insulated terminals
When to Replace
- To repair a broken or frayed wire
- To lengthen an existing wire run
- When building new or custom wiring harnesses
- To replace a faulty, corroded, or damaged existing connector
Installation Tips
- Strip approximately 1/4 inch (6-7mm) of insulation from each wire end.
- Insert one stripped wire into the connector until it contacts the center wire stop.
- Crimp the barrel securely onto the wire using the correct die on a crimping tool.
- Insert the second wire into the opposite end and repeat the crimping process.
- Verify the connection is secure by gently pulling on both wires.
- For added insulation and strain relief, cover the finished splice with heat shrink tubing.
$5.24
Original: $14.96
-65%[Lifetime Warranty] 100 PCS Non-Insulated Butt Connectors, Butt Splice Connectors—
$14.96
$5.24Product Information
Product Information
Shipping & Returns
Shipping & Returns
Description
100 PCS Non-Insulated Butt Connectors, Butt Splice Connectors
Key Features
- Package Quantity: 100 connectors
- Type: Non-insulated butt splice
- Construction: High-conductivity tinned copper for corrosion resistance
- Design: Seamless barrel with a center wire stop for correct wire positioning and secure crimps
- Application: Joins wires end-to-end for repairs, extensions, or custom harness builds
Replaces / Cross-Reference Part Numbers
- BNT1
Compatibility & Fitment
- Wire Gauge: 22-18 AWG
- Wire Type: For use with solid or stranded copper wire
- Maximum Voltage: 600V
- Tool Requirement: Use with a standard crimping tool for non-insulated terminals
When to Replace
- To repair a broken or frayed wire
- To lengthen an existing wire run
- When building new or custom wiring harnesses
- To replace a faulty, corroded, or damaged existing connector
Installation Tips
- Strip approximately 1/4 inch (6-7mm) of insulation from each wire end.
- Insert one stripped wire into the connector until it contacts the center wire stop.
- Crimp the barrel securely onto the wire using the correct die on a crimping tool.
- Insert the second wire into the opposite end and repeat the crimping process.
- Verify the connection is secure by gently pulling on both wires.
- For added insulation and strain relief, cover the finished splice with heat shrink tubing.