[Lifetime Warranty] W10612022 Dryer Rear Drum Felt Seal Kit for Whirlpool, Maytag, Kenmore, Crosley Dryers - Replaces MEDC215EW, AP5737110, PS8691753, AP3094267, PS334327, W10389561
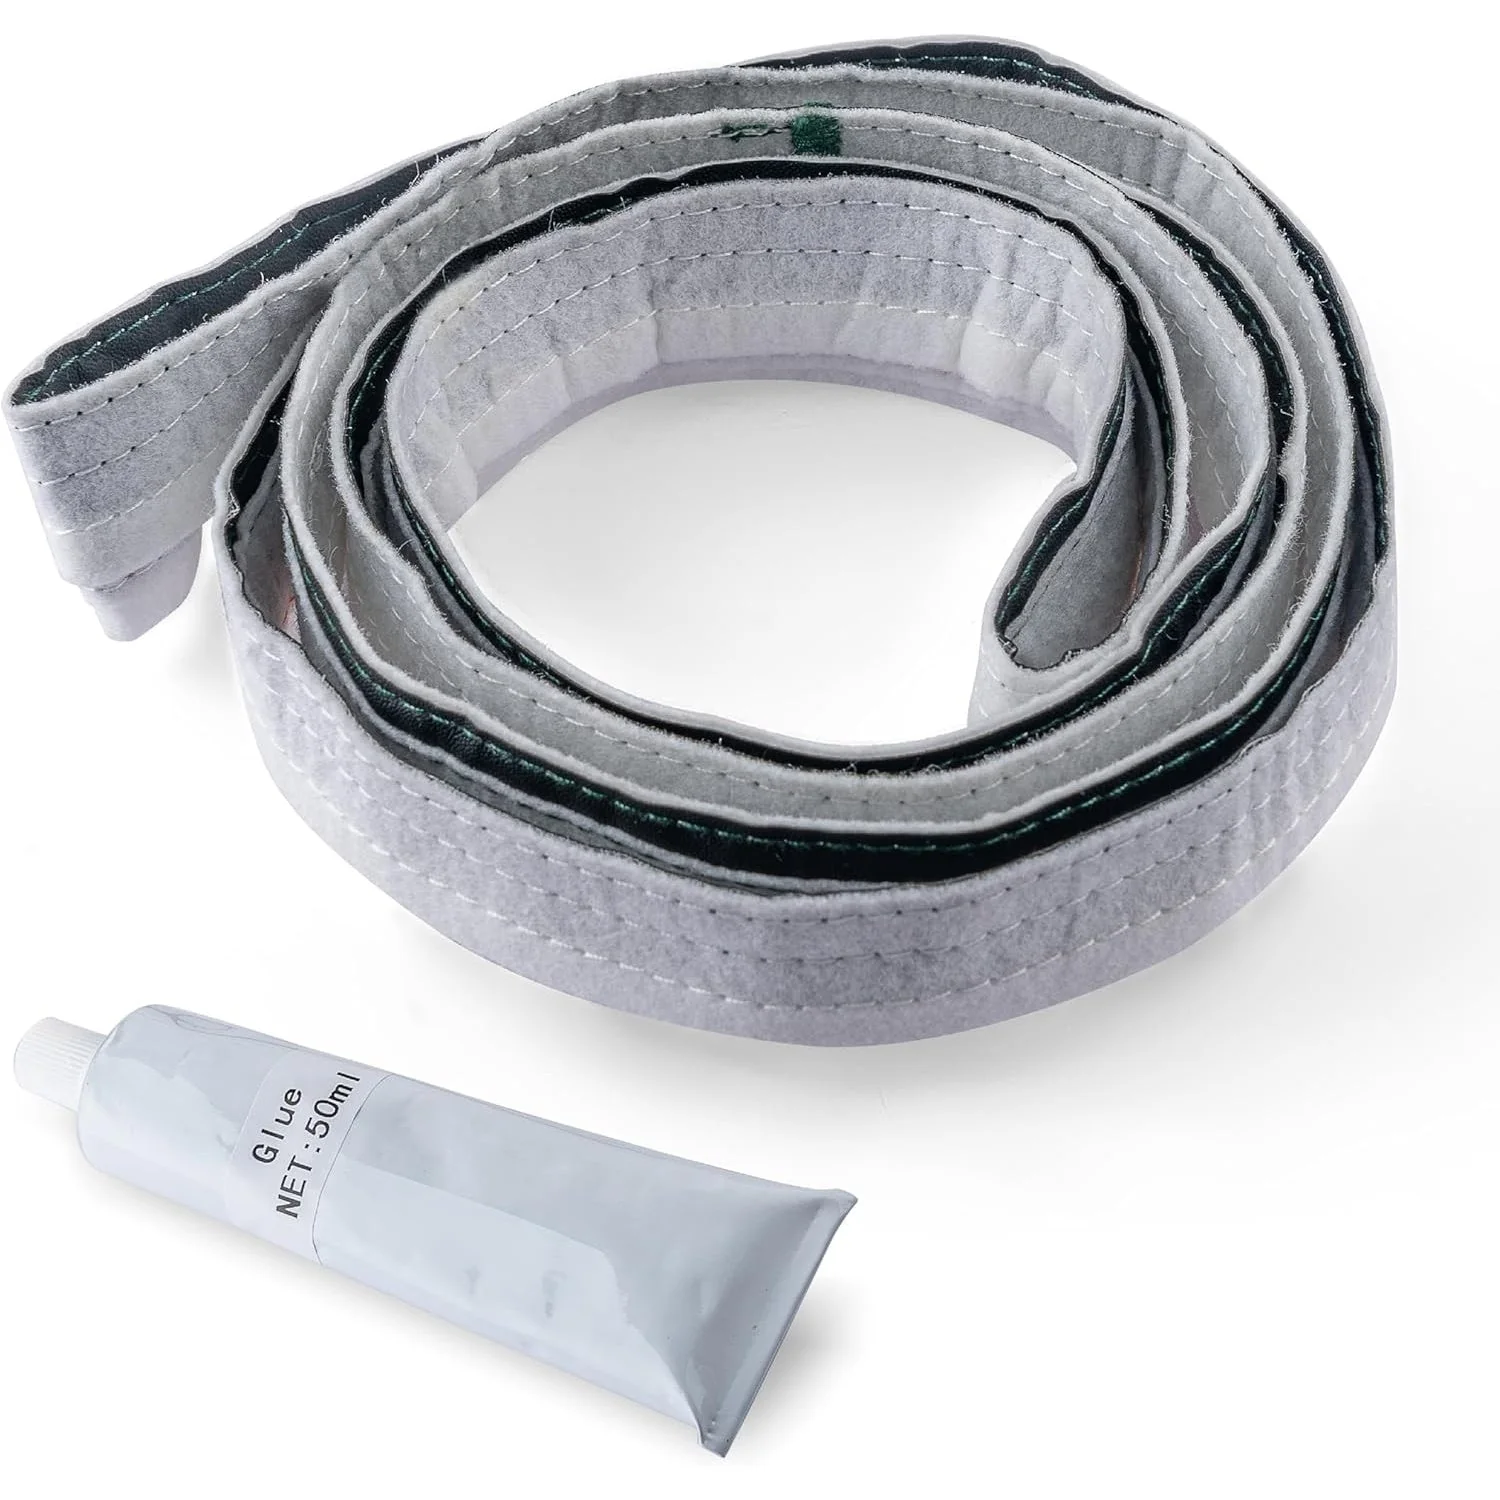
W10612022 Dryer Rear Drum Felt Seal & Adhesive Kit
Key Features
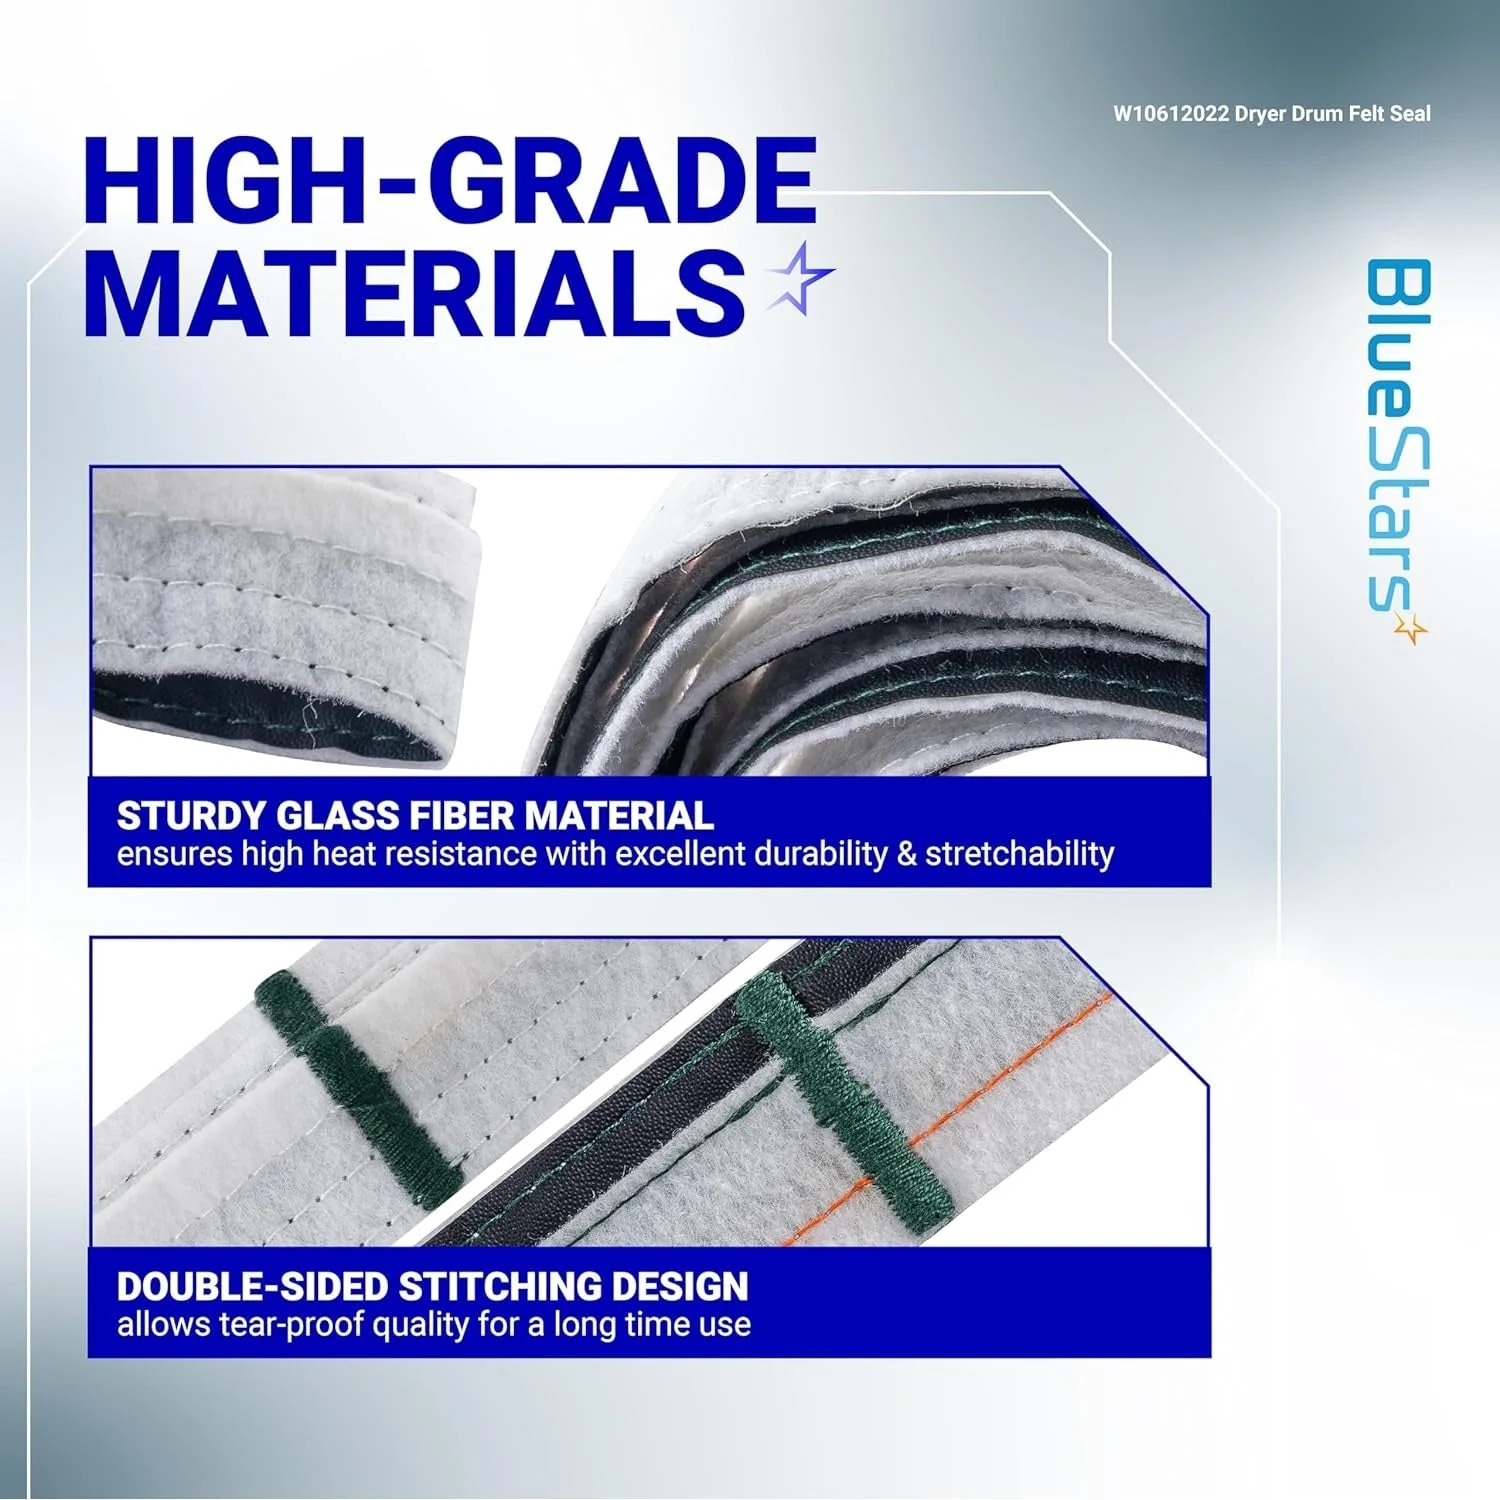
- High-Temperature Synthetic Felt: Manufactured from premium, heat-resistant synthetic fibers designed to maintain structural integrity and a flexible seal even under the intense, constant heat of heavy drying cycles.
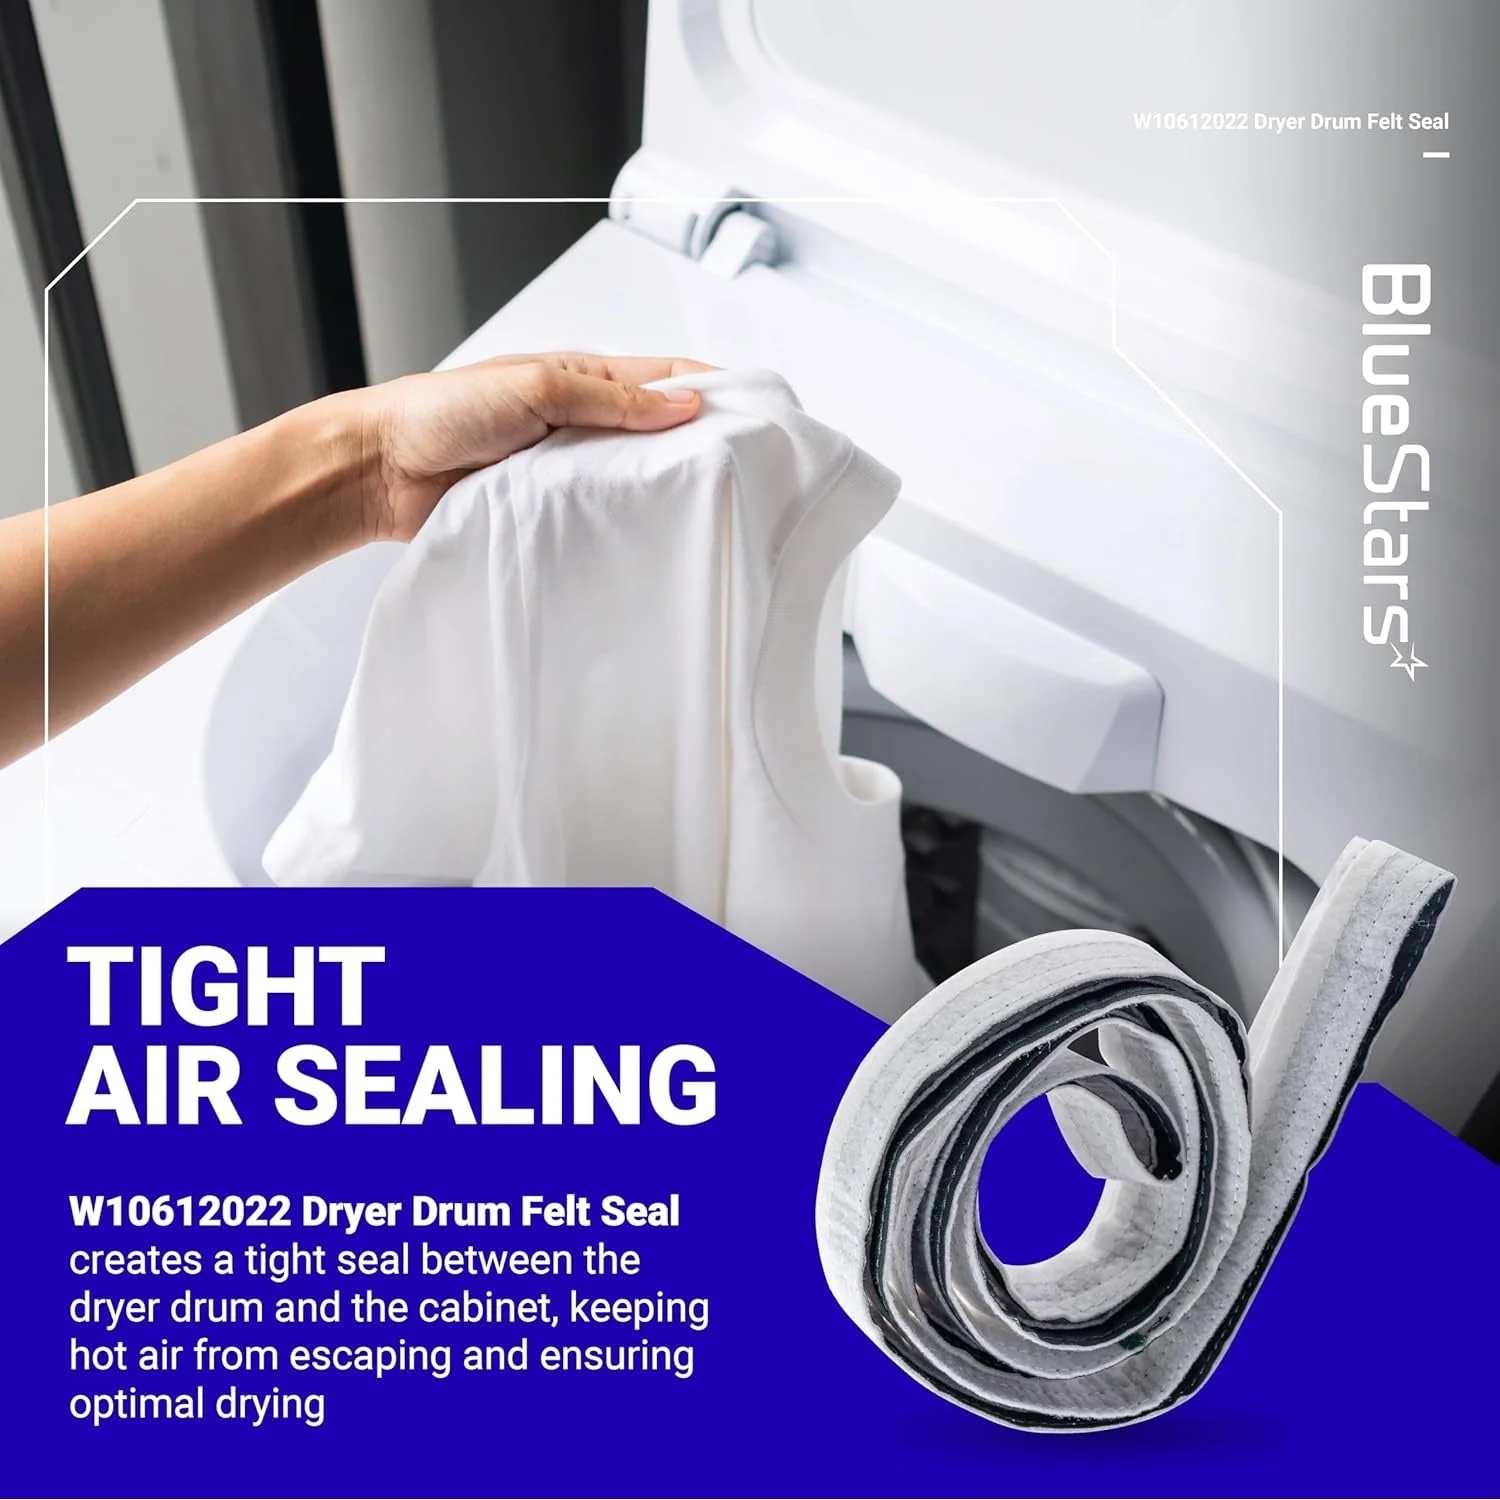
- Airtight Airflow Seal: Engineered to create a precise mechanical barrier between the rotating drum and the rear bulkhead, ensuring that heated air is forced through the laundry rather than escaping into the cabinet.
- Friction-Reducing Surface: Features a specialized low-friction finish that allows the drum to rotate smoothly against the stationary rear panel, reducing the electrical load on the drive motor and preventing premature wear.
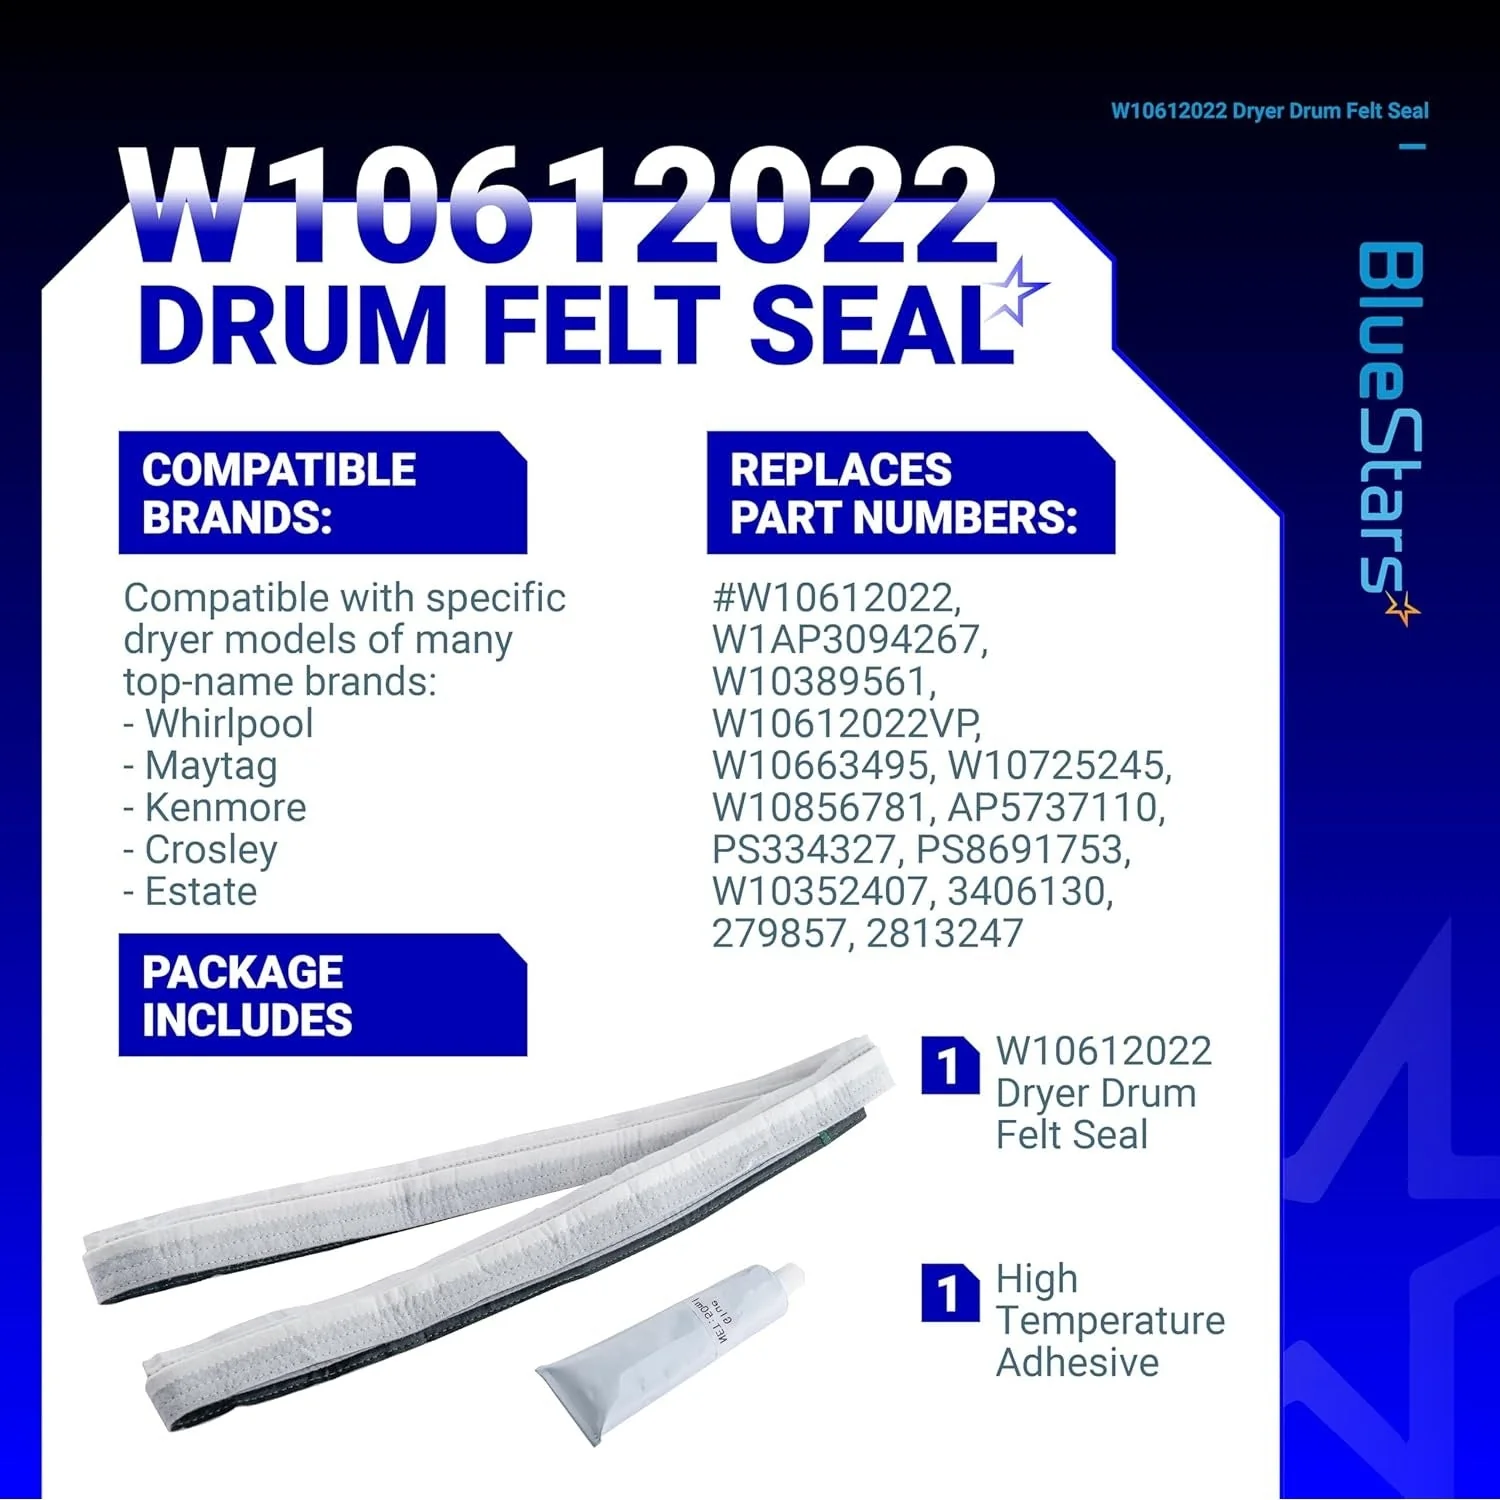
- Industrial-Grade High-Heat Adhesive: Includes a tube of specialized high-temperature adhesive specifically formulated to bond the felt to the metal drum, providing a permanent hold that won't peel or degrade at 160°F+ temperatures.
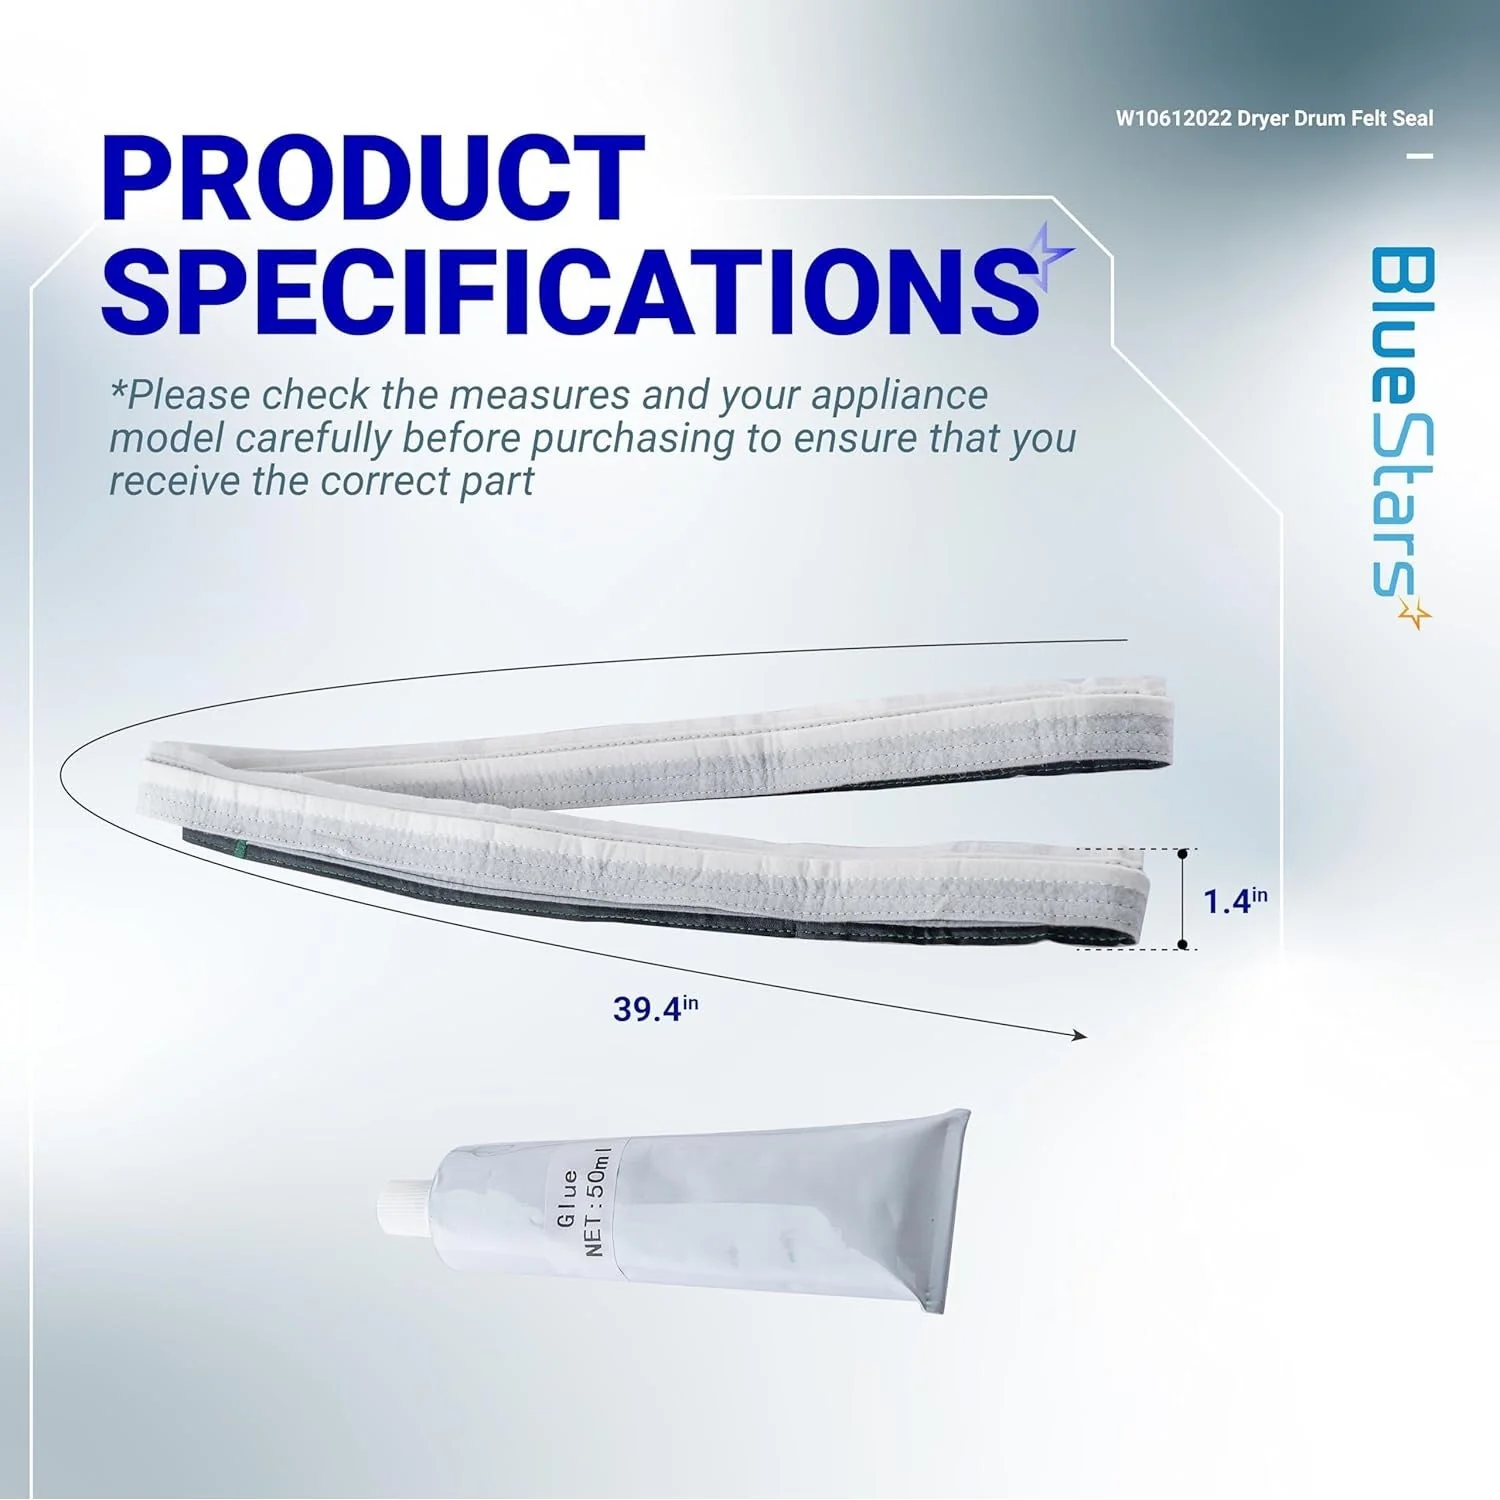
- Precision-Cut Length: Pre-measured to the exact factory specifications for 29-inch wide Whirlpool-built dryers, ensuring a perfect 360-degree seal without overlapping or gaps that cause air leaks.
Replaces / Cross-Reference Part Numbers
- Primary Part Number: W10612022.
- Industry Standards: AP5737110, PS8691753, EAP8691753.
- Legacy Cross-Reference: W10389561, 3394543, 3399506, 3399507, 4162811, 4163556, 4319340.
- Other Codes: AP3094267, PS334327, AH334327, EA334327, PD00002443.
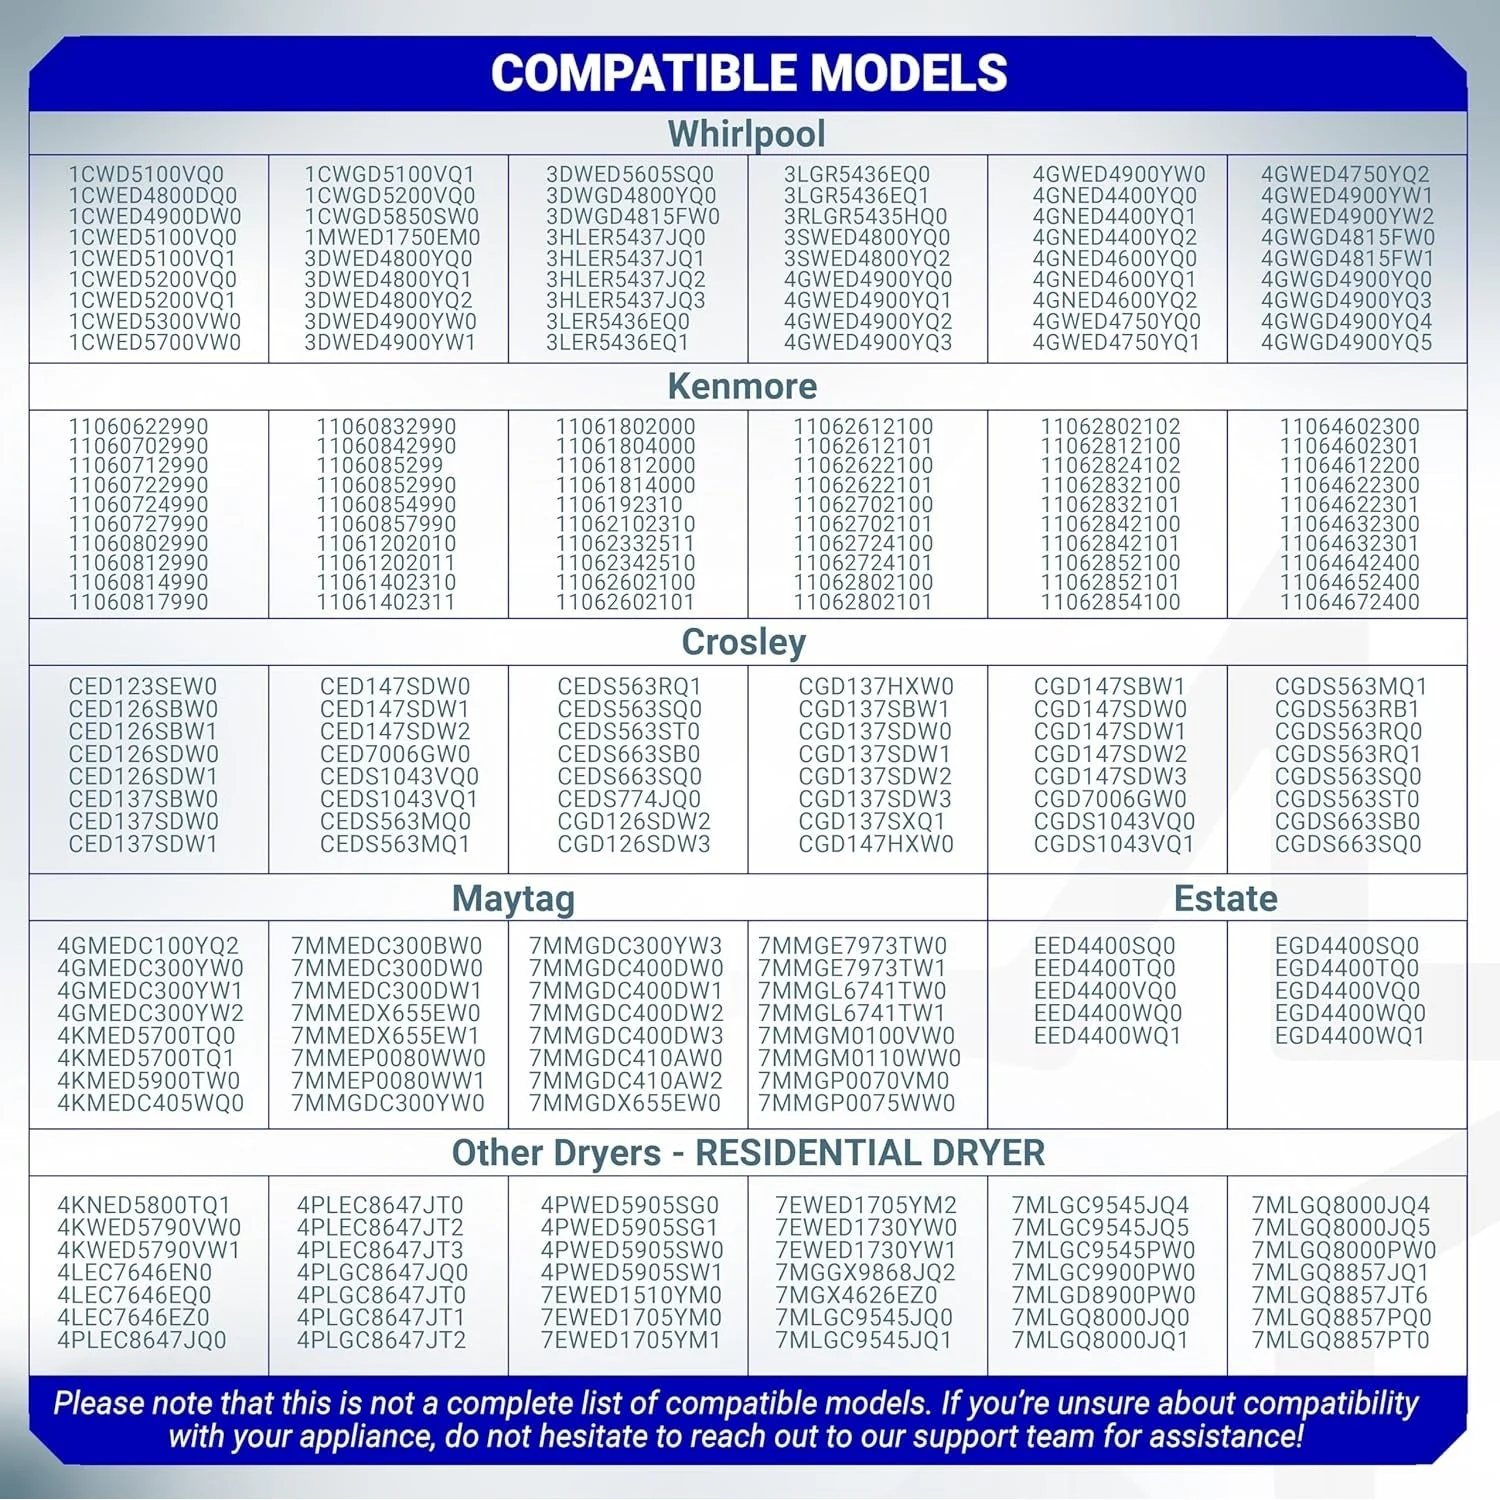
Compatibility & Fitment
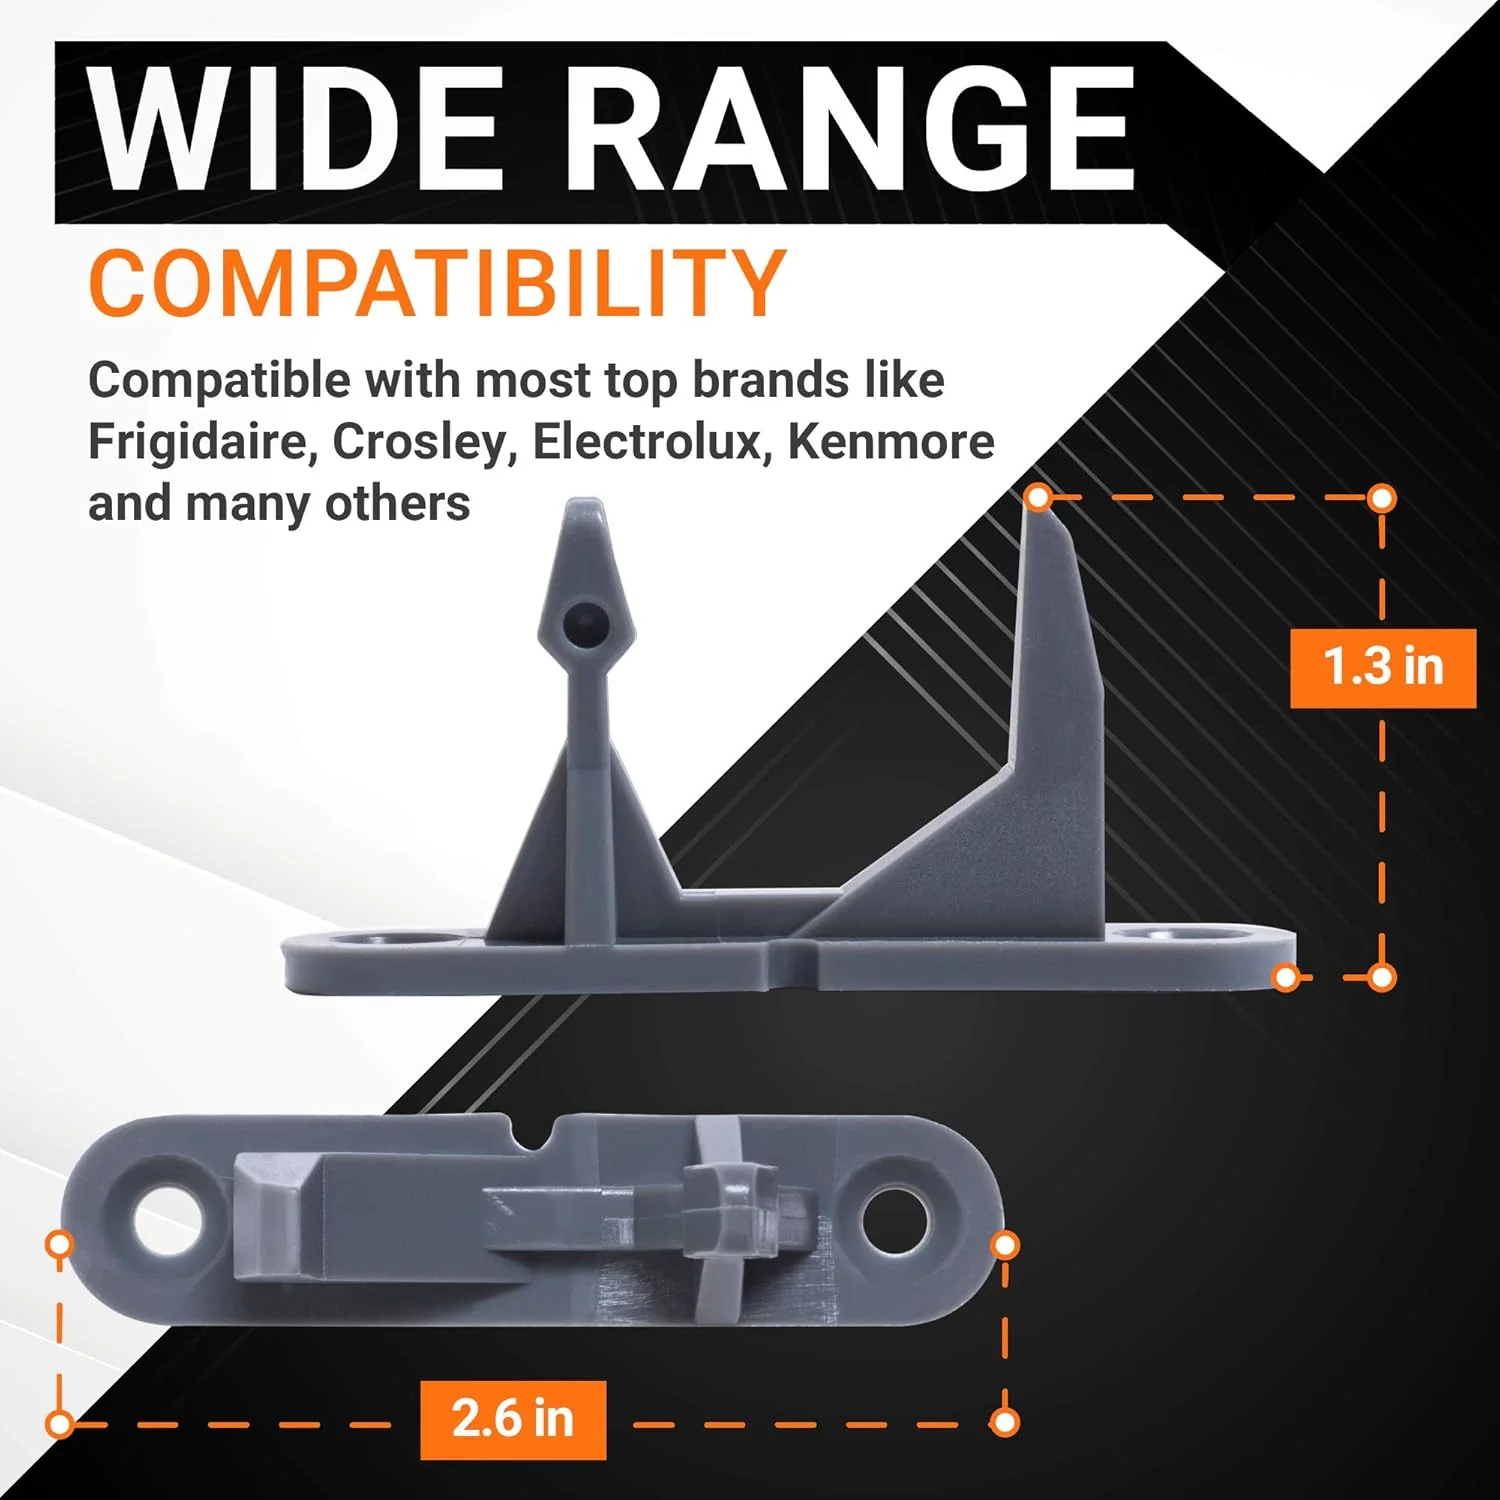
This felt seal kit is the standard rear drum support and air-seal component for the vast majority of Whirlpool-manufactured dryers. Key compatible brands include:
- Whirlpool & Kenmore: Fits hundreds of 29-inch front-load and top-load matched dryers including the MEDC, WED, and 110. series (e.g., MEDC215EW0).
- Maytag: Compatible with various Centennial and Bravos series units produced after the Whirlpool transition.
- Crosley, Amana, & Admiral: Direct fit for value-tier residential models utilizing the standard rear-seal configuration.
- KitchenAid, Estate, & Roper: Fits premium and legacy models built on the standardized 29-inch cabinet chassis.
- Note: This part is specifically for the Rear of the drum. If your dryer is making noise at the front, you likely need the front felt seal (WPW10314173) or drum glides instead.
When to Replace
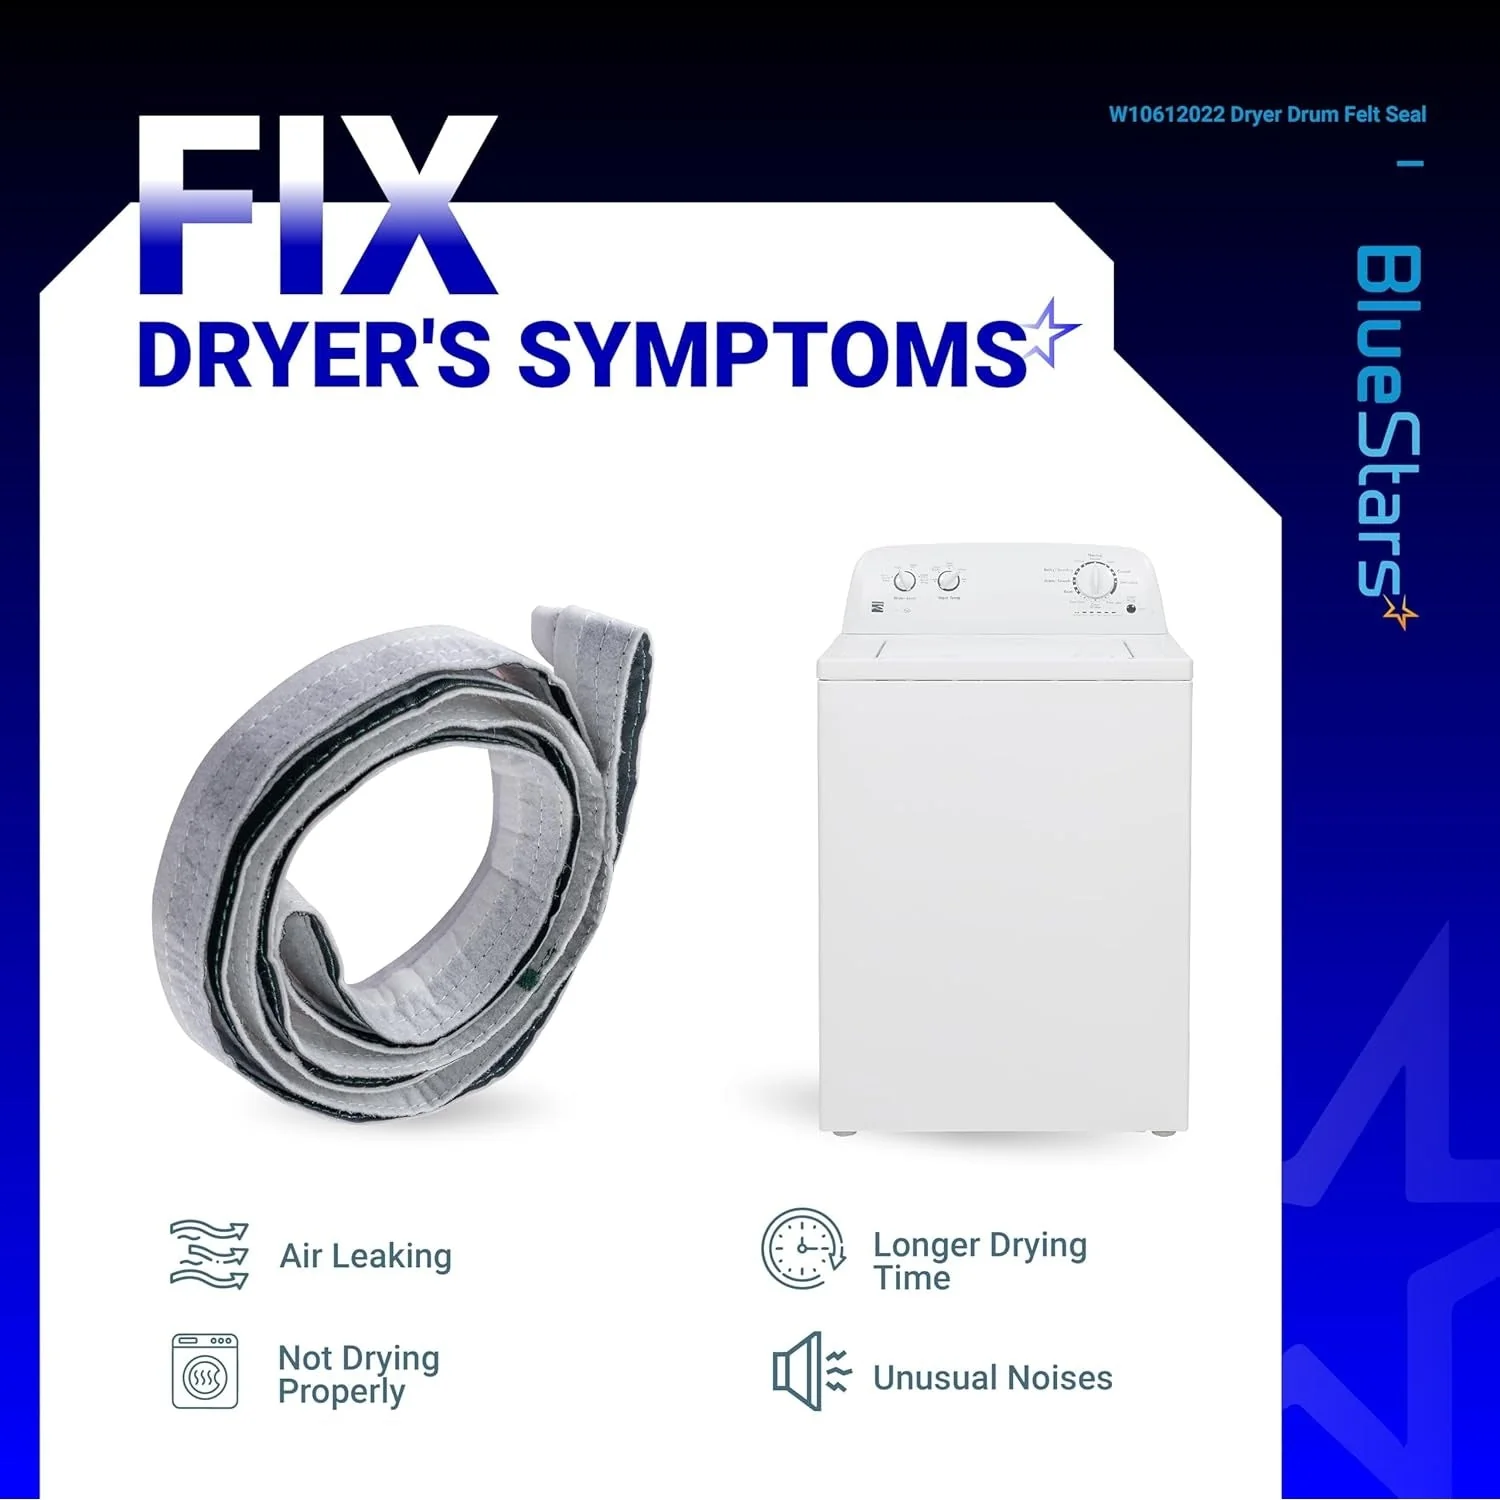
- Scraping or Thumping Noise: The felt has worn down or flattened, allowing the metal drum to rub directly against the stationary rear metal bulkhead.
- Torn or Ruined Clothing: If the seal is loose or missing sections, clothes can get caught in the gap between the drum and the rear panel, resulting in "pinch marks," brown oil stains, or torn fabric.
- Excessive Drying Times: A failed seal allows hot air to bypass the drum; if you notice your dryer is taking two cycles to dry a standard load, the seal may be leaking.
- Black Marks on Clothes: Worn-out felt can release synthetic fibers or allow internal grease to reach the drum, leaving dark streaks on white fabrics.
- Visible Felt Protruding: You can see bits of gray or white felt inside the drum or falling out of the back of the dryer cabinet.
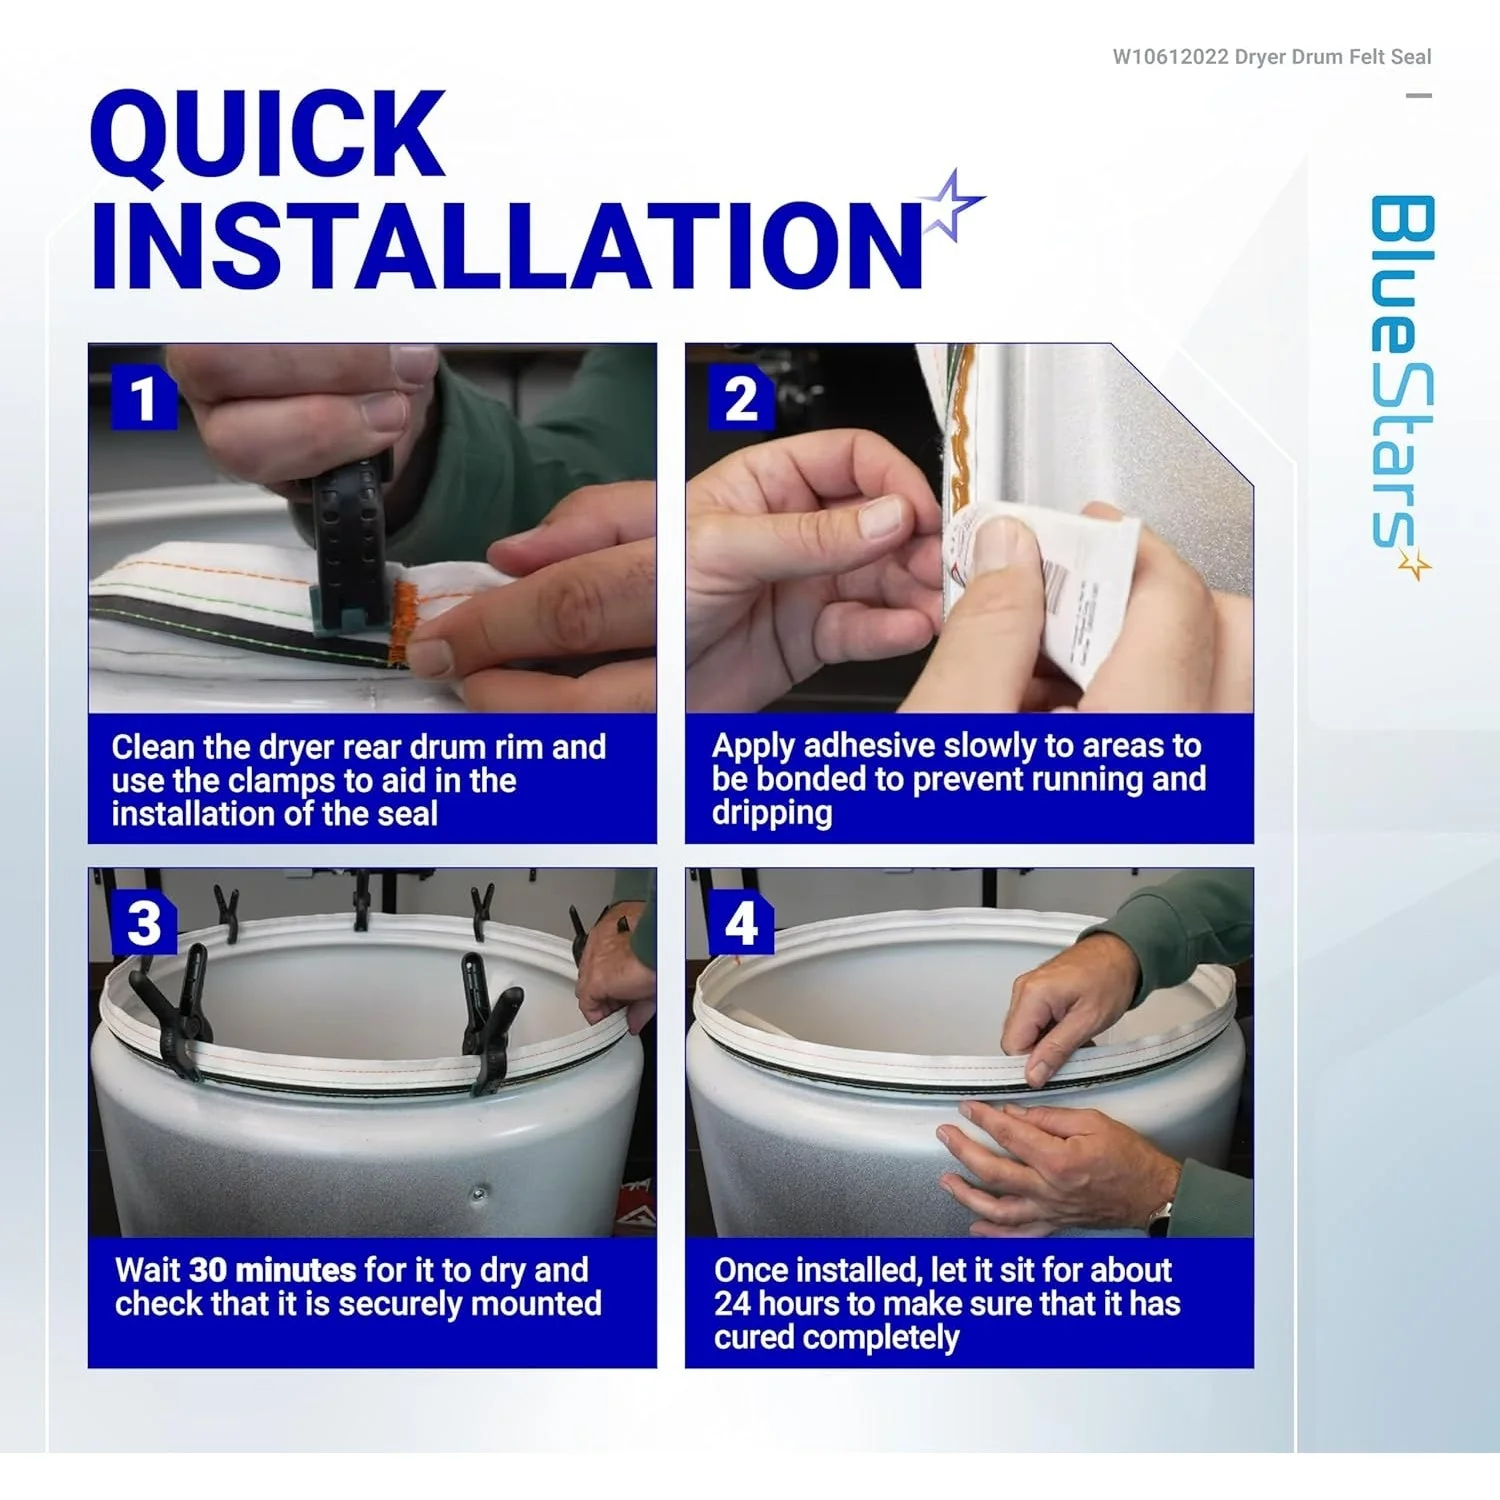
Installation Tips
- Safety First: CRITICAL: Unplug the dryer from the 240V power source. You will need to remove the top and front panels and pull the drum completely out of the cabinet.
- Surface Preparation: PRO TIP: Use a putty knife and rubbing alcohol to remove every trace of the old adhesive and felt from the drum rim. The new adhesive will not bond correctly to old residue.
- Adhesive Application: Apply a continuous, thin "bead" of the included adhesive around the drum flange. Do not over-apply; a thin, even layer provides the strongest bond and prevents "squeeze-out" onto the felt surface.
- Orient the "Tail": Ensure the seam (where the two ends of the felt meet) is positioned correctly according to the original factory orientation, usually at the top of the drum when at rest.
- Cure Time: IMPORTANT: You MUST let the adhesive dry for at least 4 to 8 hours (preferably overnight) before running the dryer. If you start a cycle too early, the heat and centrifugal force will cause the seal to peel off immediately.
Product Information
Product Information
Shipping & Returns
Shipping & Returns
[Lifetime Warranty] W10612022 Dryer Rear Drum Felt Seal Kit for Whirlpool, Maytag, Kenmore, Crosley Dryers - Replaces MEDC215EW, AP5737110, PS8691753, AP3094267, PS334327, W10389561
[Lifetime Warranty] W10612022 Dryer Rear Drum Felt Seal Kit for Whirlpool, Maytag, Kenmore, Crosley Dryers - Replaces MEDC215EW, AP5737110, PS8691753, AP3094267, PS334327, W10389561
W10612022 Dryer Rear Drum Felt Seal & Adhesive Kit
Key Features
- High-Temperature Synthetic Felt: Manufactured from premium, heat-resistant synthetic fibers designed to maintain structural integrity and a flexible seal even under the intense, constant heat of heavy drying cycles.
- Airtight Airflow Seal: Engineered to create a precise mechanical barrier between the rotating drum and the rear bulkhead, ensuring that heated air is forced through the laundry rather than escaping into the cabinet.
- Friction-Reducing Surface: Features a specialized low-friction finish that allows the drum to rotate smoothly against the stationary rear panel, reducing the electrical load on the drive motor and preventing premature wear.
- Industrial-Grade High-Heat Adhesive: Includes a tube of specialized high-temperature adhesive specifically formulated to bond the felt to the metal drum, providing a permanent hold that won't peel or degrade at 160°F+ temperatures.
- Precision-Cut Length: Pre-measured to the exact factory specifications for 29-inch wide Whirlpool-built dryers, ensuring a perfect 360-degree seal without overlapping or gaps that cause air leaks.
Replaces / Cross-Reference Part Numbers
- Primary Part Number: W10612022.
- Industry Standards: AP5737110, PS8691753, EAP8691753.
- Legacy Cross-Reference: W10389561, 3394543, 3399506, 3399507, 4162811, 4163556, 4319340.
- Other Codes: AP3094267, PS334327, AH334327, EA334327, PD00002443.
Compatibility & Fitment
This felt seal kit is the standard rear drum support and air-seal component for the vast majority of Whirlpool-manufactured dryers. Key compatible brands include:
- Whirlpool & Kenmore: Fits hundreds of 29-inch front-load and top-load matched dryers including the MEDC, WED, and 110. series (e.g., MEDC215EW0).
- Maytag: Compatible with various Centennial and Bravos series units produced after the Whirlpool transition.
- Crosley, Amana, & Admiral: Direct fit for value-tier residential models utilizing the standard rear-seal configuration.
- KitchenAid, Estate, & Roper: Fits premium and legacy models built on the standardized 29-inch cabinet chassis.
- Note: This part is specifically for the Rear of the drum. If your dryer is making noise at the front, you likely need the front felt seal (WPW10314173) or drum glides instead.
When to Replace
- Scraping or Thumping Noise: The felt has worn down or flattened, allowing the metal drum to rub directly against the stationary rear metal bulkhead.
- Torn or Ruined Clothing: If the seal is loose or missing sections, clothes can get caught in the gap between the drum and the rear panel, resulting in "pinch marks," brown oil stains, or torn fabric.
- Excessive Drying Times: A failed seal allows hot air to bypass the drum; if you notice your dryer is taking two cycles to dry a standard load, the seal may be leaking.
- Black Marks on Clothes: Worn-out felt can release synthetic fibers or allow internal grease to reach the drum, leaving dark streaks on white fabrics.
- Visible Felt Protruding: You can see bits of gray or white felt inside the drum or falling out of the back of the dryer cabinet.
Installation Tips
- Safety First: CRITICAL: Unplug the dryer from the 240V power source. You will need to remove the top and front panels and pull the drum completely out of the cabinet.
- Surface Preparation: PRO TIP: Use a putty knife and rubbing alcohol to remove every trace of the old adhesive and felt from the drum rim. The new adhesive will not bond correctly to old residue.
- Adhesive Application: Apply a continuous, thin "bead" of the included adhesive around the drum flange. Do not over-apply; a thin, even layer provides the strongest bond and prevents "squeeze-out" onto the felt surface.
- Orient the "Tail": Ensure the seam (where the two ends of the felt meet) is positioned correctly according to the original factory orientation, usually at the top of the drum when at rest.
- Cure Time: IMPORTANT: You MUST let the adhesive dry for at least 4 to 8 hours (preferably overnight) before running the dryer. If you start a cycle too early, the heat and centrifugal force will cause the seal to peel off immediately.
$23.60
[Lifetime Warranty] W10612022 Dryer Rear Drum Felt Seal Kit for Whirlpool, Maytag, Kenmore, Crosley Dryers - Replaces MEDC215EW, AP5737110, PS8691753, AP3094267, PS334327, W10389561—
$23.60
Product Information
Product Information
Shipping & Returns
Shipping & Returns
Description
W10612022 Dryer Rear Drum Felt Seal & Adhesive Kit
Key Features
- High-Temperature Synthetic Felt: Manufactured from premium, heat-resistant synthetic fibers designed to maintain structural integrity and a flexible seal even under the intense, constant heat of heavy drying cycles.
- Airtight Airflow Seal: Engineered to create a precise mechanical barrier between the rotating drum and the rear bulkhead, ensuring that heated air is forced through the laundry rather than escaping into the cabinet.
- Friction-Reducing Surface: Features a specialized low-friction finish that allows the drum to rotate smoothly against the stationary rear panel, reducing the electrical load on the drive motor and preventing premature wear.
- Industrial-Grade High-Heat Adhesive: Includes a tube of specialized high-temperature adhesive specifically formulated to bond the felt to the metal drum, providing a permanent hold that won't peel or degrade at 160°F+ temperatures.
- Precision-Cut Length: Pre-measured to the exact factory specifications for 29-inch wide Whirlpool-built dryers, ensuring a perfect 360-degree seal without overlapping or gaps that cause air leaks.
Replaces / Cross-Reference Part Numbers
- Primary Part Number: W10612022.
- Industry Standards: AP5737110, PS8691753, EAP8691753.
- Legacy Cross-Reference: W10389561, 3394543, 3399506, 3399507, 4162811, 4163556, 4319340.
- Other Codes: AP3094267, PS334327, AH334327, EA334327, PD00002443.
Compatibility & Fitment
This felt seal kit is the standard rear drum support and air-seal component for the vast majority of Whirlpool-manufactured dryers. Key compatible brands include:
- Whirlpool & Kenmore: Fits hundreds of 29-inch front-load and top-load matched dryers including the MEDC, WED, and 110. series (e.g., MEDC215EW0).
- Maytag: Compatible with various Centennial and Bravos series units produced after the Whirlpool transition.
- Crosley, Amana, & Admiral: Direct fit for value-tier residential models utilizing the standard rear-seal configuration.
- KitchenAid, Estate, & Roper: Fits premium and legacy models built on the standardized 29-inch cabinet chassis.
- Note: This part is specifically for the Rear of the drum. If your dryer is making noise at the front, you likely need the front felt seal (WPW10314173) or drum glides instead.
When to Replace
- Scraping or Thumping Noise: The felt has worn down or flattened, allowing the metal drum to rub directly against the stationary rear metal bulkhead.
- Torn or Ruined Clothing: If the seal is loose or missing sections, clothes can get caught in the gap between the drum and the rear panel, resulting in "pinch marks," brown oil stains, or torn fabric.
- Excessive Drying Times: A failed seal allows hot air to bypass the drum; if you notice your dryer is taking two cycles to dry a standard load, the seal may be leaking.
- Black Marks on Clothes: Worn-out felt can release synthetic fibers or allow internal grease to reach the drum, leaving dark streaks on white fabrics.
- Visible Felt Protruding: You can see bits of gray or white felt inside the drum or falling out of the back of the dryer cabinet.
Installation Tips
- Safety First: CRITICAL: Unplug the dryer from the 240V power source. You will need to remove the top and front panels and pull the drum completely out of the cabinet.
- Surface Preparation: PRO TIP: Use a putty knife and rubbing alcohol to remove every trace of the old adhesive and felt from the drum rim. The new adhesive will not bond correctly to old residue.
- Adhesive Application: Apply a continuous, thin "bead" of the included adhesive around the drum flange. Do not over-apply; a thin, even layer provides the strongest bond and prevents "squeeze-out" onto the felt surface.
- Orient the "Tail": Ensure the seam (where the two ends of the felt meet) is positioned correctly according to the original factory orientation, usually at the top of the drum when at rest.
- Cure Time: IMPORTANT: You MUST let the adhesive dry for at least 4 to 8 hours (preferably overnight) before running the dryer. If you start a cycle too early, the heat and centrifugal force will cause the seal to peel off immediately.